Mapping with Svelte and Konva
After some attempts mapping with Svelte, I missed using canvas instead of SVG. SVG has the advantage that integrates very well with Svelte, since it’s an XML and the nodes can be managed as if they were HTML. On the other hand, Canvas is more efficient, but it has to be generated entirely with JavaScript.
At the same time, I found Konva, a promising library to draw Canvas elements and make them interactive in an easy way. It allows animations, Drag and Drop, actions, filters, etc. so it’s possible to do the same things as in SVG. I didn’t find any example of Konva for drawing maps, so here we’ll find a declarative way to do it, using Svelte.
Using Konva with Svelte
Let’s see first how to plot something using Konva and Svelte. You can check the source code at Svelte REPL. Be patient, since it has to load the npm modules!
The code here is short, and we have only one component:
<script>
	import {onMount} from 'svelte';
	import Konva from 'konva';

	let container;
	onMount(() => {
	const stage = new Konva.Stage({
        container: container,
        width: 400,
        height: 400,
    });
	const layer = new Konva.Layer();
	const simpleText = new Konva.Text({
        x: stage.width() / 2,
        y: 15,
        text: 'Hello Konva',
        fontSize: 30,
        fontFamily: 'Calibri',
        fill: 'green',
      });
		layer.add(simpleText);
		stage.add(layer);
	});
</script>

<div bind:this={container} />- Note how the div container is binded to the variable
- Since the component has to be binded, we’ll have to wait until the component is mounted to create the Konva elements
- Konva needs a Stage (cimilar to the Canvas element), one or more Layer, where you can actually draw the objects, and any shape, text or whatever we want to draw.
Konva as Svelte components
The example is not bad, but it’s not using any Svelte style coding. It would be cool declaring things like:
<Stage>
<Layer>
<Element x=100 y=100/>
<Layer>
</Stage>
Then, we could use a store to put as many elements as we wanted, for instance. Let’s see how to to that. Check the interactive example here
We’ll create a component for the Stage, another for the Layer and finally, a Circle component that acually draws a circle.
The Stage component is like this:
<script>
	import Konva from 'konva';
	import { onMount, setContext } from 'svelte';

	setContext("konva", {
		getStage: () => stage
	});

	let container;
	let stage;
	onMount(() => {
	 stage = new Konva.Stage({
        container: container,
        width: 400,
        height: 400,
    });

	});
	</script>

    <div bind:this={container}>
    	{#if container}
    		<slot></slot>
    	{/if}

</div>- As in the other case, you’ll see that we need to create the node where we’ll add all the stuff, plus the binding.
- The slot will allow us to add children components. Layers in this case.
- We create a context. This way, the Layer component will have access to the Konva stage object without passing it in the props. Since this component won’t be touched when creating new drawings, it’s much cleaner.
Then the Layer component:
<script>
	import Konva from 'konva';
	import { getContext, setContext } from 'svelte';
	const { getStage } = getContext("konva");
	setContext("konva_layer", {
		getLayer: () => layer
	});
	const stage = getStage();
	let layer = new Konva.Layer();
	stage.add(layer);
</script>

<slot></slot>
- This one is much simpler, since we don’t have to create HTML elements.
- We create another context for the layer, so its children can have access to it.
Finally, the Circle component is:
<script>
	import Konva from 'konva';
	import { getContext, onDestroy } from 'svelte';

	export let x = 0;
	export let y = 0;
	export let r = 1;
	export let fill = "black";
	export let stroke = "black";
	export let strokeWidth = 1;

	const { getLayer } = getContext("konva_layer");
	const layer = getLayer();

	const circle = new Konva.Circle({
        x: x,
        y: y,
        radius: r,
        fill: fill,
        stroke: stroke,
        strokeWidth: strokeWidth,
      });
	layer.add(circle);
	layer.draw();
	onDestroy(() => circle.destroy());
</script>
- We export most of the parameters so they can be used as props, although they have a default value
- We have to call layer.draw() or the object won’t be drawn. That’s because we are creating it before the layer is added into the stage.
- We have to destroy the object on deleting the component, or we’ll have memory leaks. Think if we had hundreds of circles appearing and disappearing when a store value changes…
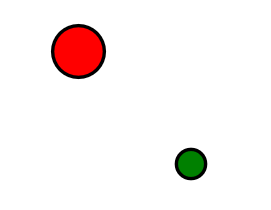
And now the cool part. To create the drawing, we only call:
<Stage>
<Layer>
<Circle x=100 y=100 r=23 fill="red" strokeWidth=3/>
<Circle x=200 y=200 r=13 fill="green" strokeWidth=3/>
</Layer>
</Stage>
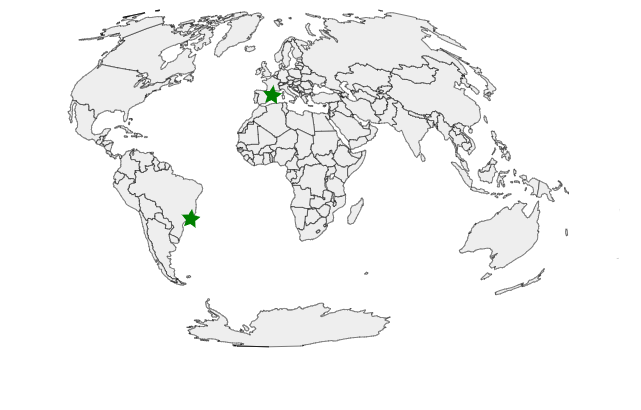
Creating a map
So now, with the knowledge from the previous examples, we can create a map. I created an intermediate (simpler) version of the map, in case somebody wants to take a look. The final version is here.
Let’s start from the other side now! The App.svelte file is this one:
<script>
	import {onMount} from 'svelte';
	import Stage from './Stage.svelte';
	import Layer from './Layer.svelte';
	import Marker from './Marker.svelte';
	import BackgroundMap from './BackgroundMap.svelte';
	import { message } from './store.js';

	let message_value;
	message.subscribe(value => {
		message_value = value;
	});
</script>

<Stage>
	<Layer>
		<BackgroundMap />
	</Layer>
	<Layer>
		<Marker lon=-43.1 lat=-22.9068 fill="green" markerMessage="Marker: Rio de Janeiro"/>
		<Marker lon=2 lat=41 fill="green" markerMessage="Marker: Barcelona"/>
	</Layer>
</Stage>
<p>
	{message_value}
</p>- We are using a BackgroundMap component and as many Marker components as we want.
- There’s a writable store where the children will put the name of the hovered feature. In the App component we’ll just render it.
- I use two layers because when using one, the markers can’t be detected if they are over a country. z-index is not well managed in konvas.
The projection and D3 GeoPath are defined in their own file so they can be accessed from all the components:
import { geoPath } from "d3-geo";
import { geoAitoff } from "d3-geo-projection";

const width = 600;
const height = 400;

export const projection = geoAitoff()
  .translate([width / 2, height / 2])
  .scale(110);

export const path = geoPath().projection(projection);- The size and zooms are fixed. If we wanted a more complex map, we could make this a store and then chenge the values from a slider or a mouse event
The BackgroundMap component is:
<script>
import Konva from 'konva';
import { getContext, onMount } from 'svelte';
import { feature } from "topojson";
import { path } from './projection';
import { message } from './store.js';

const { getLayer } = getContext("konva_layer");
const layer = getLayer();

onMount(async function() {
const response = await fetch(
      "https://gist.githubusercontent.com/denisemauldin/a2fa29af082e85dfaf27d100be01fa47/raw/6b3a5b9b29151739964612c8a7cff23707386d84/readme-world-110m.json"
    );
    const json = await response.json();
    const topoData = feature(json, json.objects.countries);
    const data = topoData.features;
	data.forEach(country =>{
		const konvaPath = new Konva.Path({

        data: path(country),
        stroke: 'black',
			strokeWidth: 0.5

			});
		konvaPath.on('mouseover', function () {
        message.set(country.id)
     });
		layer.add(konvaPath);

	})

		layer.draw();
});
</script>
- We can only draw when the file with the data is downloaded, so we’ll put this in an onMount element
- We iterate for each country and create a Konva element for it. So we’ll have hundreds of them here.
- Note how Konva handles the mouseover event.
Finally, the markers with animation:
<script>
	import Konva from 'konva';
	import { projection } from './projection';
  import { message } from './store.js';
	import { getContext, onDestroy } from 'svelte';

	export let lon = 0;
	export let lat = 0;
	export let fill = "black";
	export let markerMessage = "Marker";
	const coords = projection([lon, lat]);

	const { getLayer } = getContext("konva_layer");
	const layer = getLayer();

	const konvaPath = new Konva.Star({
		x: coords[0],
		y: coords[1],
        fill: fill,
			strokeWidth: 0.5,
		numPoints: 5,
        innerRadius: 5,
        outerRadius: 10,

			});
	konvaPath.on('mouseover', function () {
        message.set(markerMessage)
     });
	layer.add(konvaPath);

	const angularSpeed = 30;
      const anim = new Konva.Animation(function (frame) {
        var angleDiff = (frame.timeDiff * angularSpeed) / 1000;
        konvaPath.rotate(angleDiff);
      }, layer);

      anim.start();

	layer.draw();
    onDestroy(() => konvaPath.destroy());
</script>
- Very similar to the circle case, but with a Star element in this case.
- The animation is a rotation in this case. But the color can be changed too, the size, etc.
- I checked using a path instead of a star and a scale must be applied unless your icon has the proper size. Then, an animation that changes this size can’t be used easily. Also, the scale is difficult to find. There’s a width and height prop that isn’t used.
Conclusions
I’m very happy with the result. In not many hours, I could make a base for mapping in an easy way with all the Svelte capabilities. Svelte is awesome!
Links
- First example First example: Svelte and Konva
- Second example Second example: Using components
- Intermediate third example Intermediate third example
- Third example Second example: Mapping with actions and animations
- Mapping with Svelte
- Konva web site